


DesignPLUS Wizards, Templates, and Content Blocks
The expanders below contain information about several DesignPLUS tools. If you want more, join the self-paced Introduction to DesignPLUS training course.
QuickStart Wizard
The QuickStart Wizard gives you access to all of the Fullerton College Templates and Content Blocks without opening the full DesignPLUS Sidebar. This tool is only available on new Canvas content. If your Page, Discussion, Assignment, etc. already has content on it, you will not see the QuickStart Wizard button.
To use the QuickStart Wizard, follow the steps below:
- Create a new Canvas Page, Announcement, Assignment, Discussion, or Quiz.
- Select Edit.
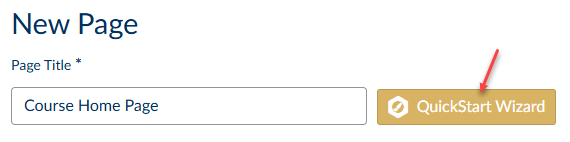
- Use the DesignPLUS QuickStart Wizard button. (This button can take a few seconds to appear, so do not panic if you don’t see it immediately.)
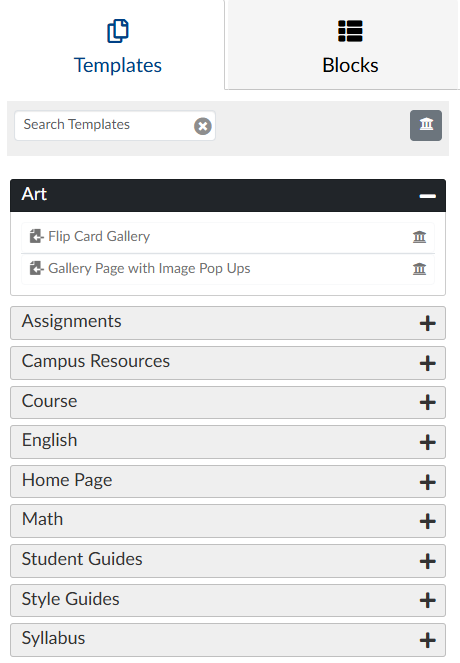
- Select either the Templates tab or the Content Blocks tab and use the expanders to browse the available Templates and Content Blocks.
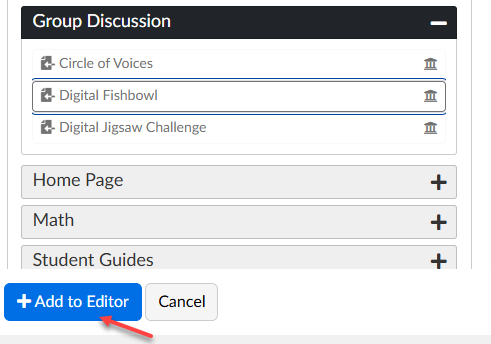
- Select the button for the template or block to add it to the Wizard preview area.
- Use the +Add to Editor button to insert the template or block into the Rich Content Editor.
Review this ~7.5-minute Cidi Labs video tutorial to learn all about the QuickStart Wizard:
Design Transformation Wizard
What about existing content that you want to convert to DesignPLUS? That is where the Design Transformation Wizard comes in. You can use this “easy button” on any Page, Assignment, Discussion, Quiz, or Announcement that has content.
Step 1: Make sure you have beta tools enabled
The Transformation Wizard is brand new and is currently in beta. To access the tool, make sure you have beta tools enabled in the DesignPLUS Sidebar.
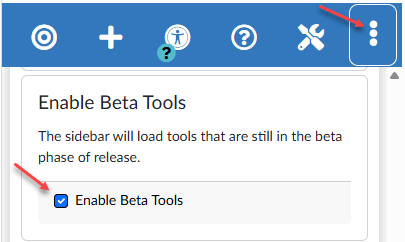
- Select the More Options tab in the DesignPLUS Sidebar.
- Select the User Settings option.
- Go down to the Enable Beta Tools section and check the box.
Step 2: Edit a Canvas Item
- Edit a Page, Assignment, Discussion, Quiz, Announcement, or Syllabus.
- Select the Transformation Wizard button. (This button can take a few seconds to appear, so do not panic if you don’t see it immediately.)

Step 3: Run the Transformation
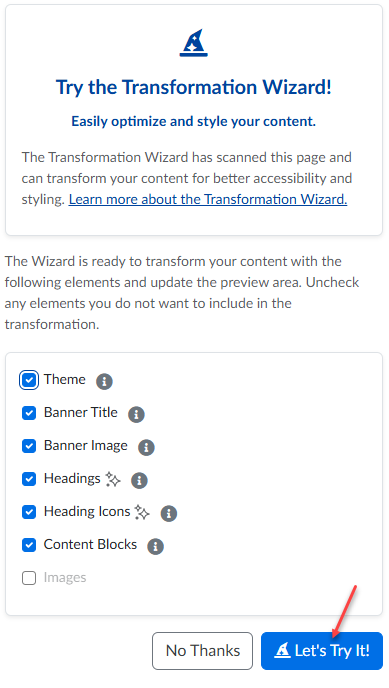
- Use the checkboxes to select the tools you want to run in the transformation window.
- Use the information button to learn more about each tool. (Please note that the Headings and the Headings Icons tools use AI. Learn more about how Cidi Labs approaches AI in their tools.)
- Use the Let’s Try It! button to start the transformation.
Step 4: Review the Heading Structure
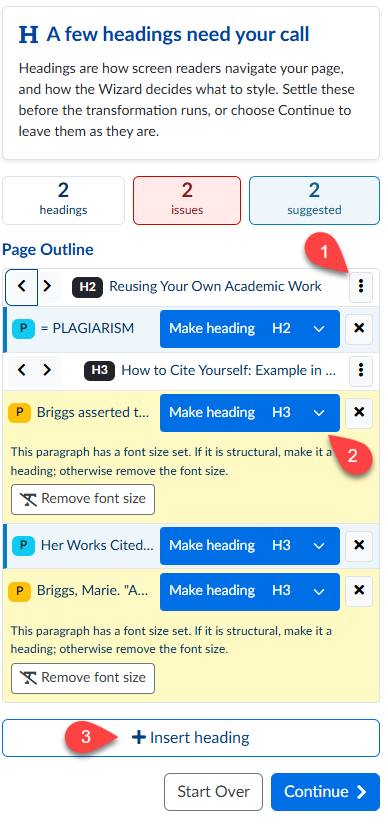
Before the full transformation happens, you will be prompted to review the headings in your content. In this panel, you can:
- Review the existing heading structure
- Convert heading-like text into true headings
- Add new headings as needed
Once you have reviewed/edited the headings, use the Continue button to move to the next transformation step.
Step 5: Review the Transformation
- Once the transformation is complete, you will see the transformed content in the preview area.
- Use the Start Review button to walk through the individual transformation.
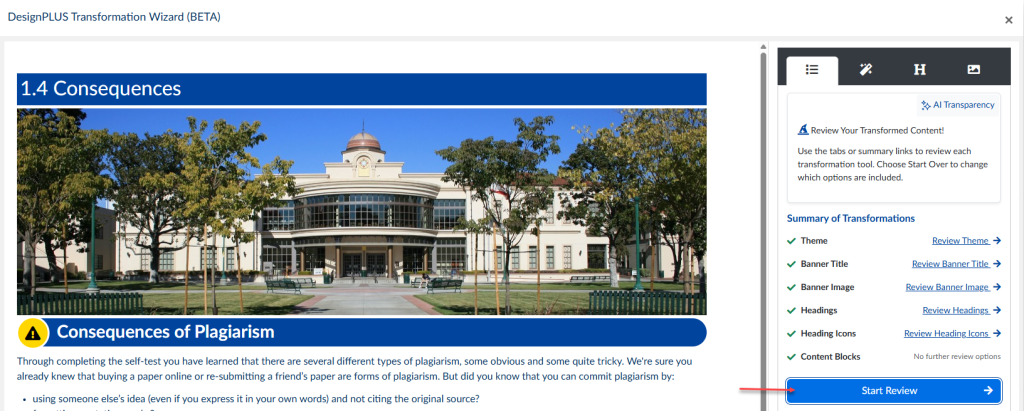
- Review and adjust the following as needed: Theme and Banner Image, Headings and Heading Icons, Image alt text, and basic image styling
- Once you have reviewed all of the transformation content, use the Apply changes to editor button to overwrite the existing content in the Rich Content Editor with the transformed content in the Wizard’s preview area.
- You can continue to edit the content in the Rich Content Editor as needed.
Review this ~6.5-minute Cidi Labs video tutorial to learn all about the Design Transformation Wizard:
Institution Home Page Templates
To use one of the Distance Education home page templates, follow the steps below:
- Create a new Canvas Page
- Use the blue rocket ship in the upper right corner to launch the DesignPLUS Sidebar
- Go to the Add New Elements tab and add the Template Content tool to the page
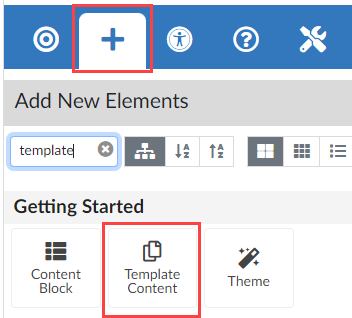
- Open the Home Page expander and select one of the options to add to your page
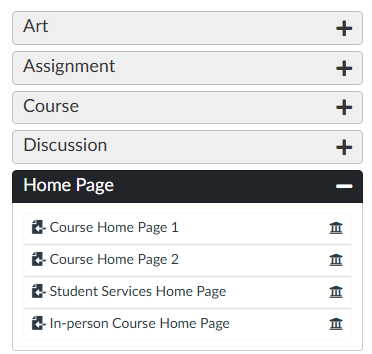
- Follow the instructions embedded in the template to customize it for your course.
Student Guides and Campus Resources Page Templates
If you need to advise your students on how to use various Canvas features or how to access campus departments and resources, check out the Student Guides and the Campus Resources in the DesignPLUS Sidebar:
- Create a new Canvas Page
- Use the blue rocket ship in the upper right corner of the screen to launch the DesignPLUS Sidebar
- Go to the Add New Elements tab and add the Template Content tool to the page
- Open either the Student Guides expander or the Campus Resources expander and select one of the options to add it to your page

Syllabus Template
- Select Syllabus in your course navigation
- Click the Edit button
- Use the blue rocket ship in the upper right corner to launch the DesignPLUS Sidebar
- Go to the Add New Elements tab and add the Template Content tool to the page
- Open the Syllabus expander and select the FC Example Syllabus Template
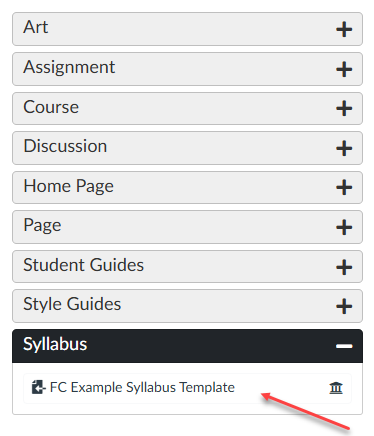
- Edit as needed for your course
Content Blocks
Follow the steps below to add content blocks to an Assignment, Discussion Board, or Quiz.
- Create a new Assignment, Announcement, Discussion Board, Page, or Quiz.
- Use the blue rocket ship in the upper right corner of the screen to launch the DesignPLUS Sidebar.
- Go to the Add New Elements tab and add a Content Block.

- In the Edit Existing Element tab, make sure the Content Block tool is selected.
- In the Content section, open the expanders and select the content blocks you would like to use.

- Edit as needed for your course.