


Canvas Accessibility Guide
Follow the principles outlined in the expanders below as you build course content to ensure that the content is as accessible and usable as possible for your students.
If you need support as you are building your Canvas content, schedule an instructional design consultation with the FC Distance Education Instructional Designer.
Alt Text for Images
Images are an excellent way to provide both information and visual interest in your Canvas content. Accessibility issues occur when we add an image that includes instructional content but fail to provide an adequate text alternative for students with visual impairments.
General Alt Text Rules
- Be equivalent in describing the content and function of the image.
- Be as succinct as possible.
- DO NOT use the phrases “image of” or “graphic of” to describe the image. The screen reader will announce the image.
- DO NOT include file extensions such as .jpg or .png
Alt Text for Complex Images
Images that are text-rich, contain complex graphs or charts, and/or are highly detailed may require more than alt text. The information delivered by the image can be explained in the text preceding or following the image. If this approach would be highly redundant for sighted students, the long description text can be placed on a separate web page or document, and a link to the long description can be provided adjacent to the image.
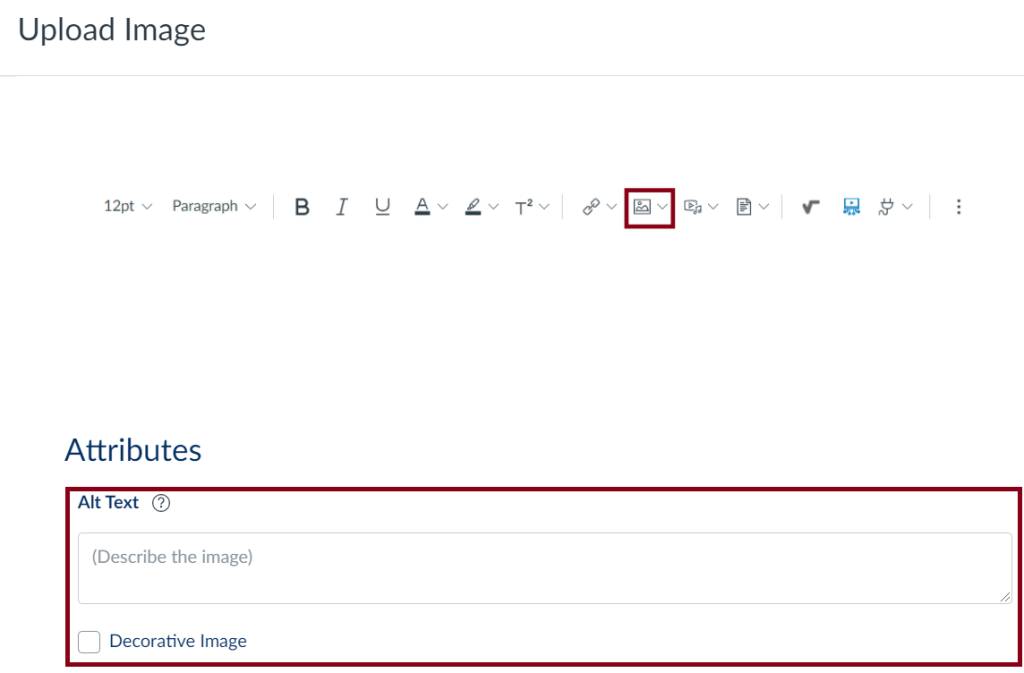
Adding Alt Text in Canvas
- Select the Images icon in the Rich Content Editor toolbar or go to Insert > Image
- Add your image
- Type your alt text description in the Alt Text box or use the Decorative Image checkbox if the image does not provide any instructional content
Color Contrast and Usage
Color Contrast
Ensure text colors are high contrast:
- Contrast ratios must be at least 4.5:1 for regular text and 3:1 for large text
- Stick to the default Canvas text color as much as possible
Color Usage
Meaningful information should not be conveyed by color alone.
Example: “All problems in red must be turned in for homework each week.” A student using a screen reader or one who has any type of colorblindness would not be able to tell which problems to turn in each week. It is fine to use color, but also ensure you are using another method. An asterisk would work well in this use case.
Headings
From an accessibility perspective, headings are valuable as they provide individuals using screen readers with a simple method to navigate a web page. In a 2023/2024 WebAim study that investigated the browsing habits of screen reader users, ~71% of individuals reported they are most likely to use heading levels as their first method to navigate a web page and ~89% of individuals reported they found heading levels very or somewhat useful. Rather than navigating line-by-line through a document or web page, the use of headings allows individuals to move through the information based on heading topic.
Think of Headings as an outline of your content. Headings should be used in a logical order and heading levels should not be skipped.
Creating Headings in Canvas
- Use the built-in styles in the Rich Content Editor to create headings
- The styles drop-down menu default is Paragraph
- Use the arrow to select Heading 2, Heading 3, etc.
- NOTE: There is no Heading 1 option as the title of your page is automatically set to Heading 1

Links
While links are one of the easiest methods to direct students to other web pages and documents, hyperlinks can also have potential accessibility challenges.
Common Hyperlink Mistakes
- Redundant link text: screen reader software announces a link is present, so there is no need to include “link” or “link to” in hyperlink text.
- Ambiguous link text: screen reader software has the ability to scan a page and create a “links list”, which allows the student to listen to a list of available hyperlinks and navigate directly to the desired hyperlink as opposed to being forced to listen to the entire page. Hyperlink text such as “read more” or “click here” does not provide the student with any information about the actual link.
Correctly Formatted Hyperlinks
- Identify the purpose or function of the hyperlink as part of the hyperlink name.
- Be as descriptive as possible without being too wordy. Remember that the student will have to listen to the whole link before moving to the next link on the list.
- Integrate the link into your sentence. Your sighted students will see the link, and screen readers will identify the link.
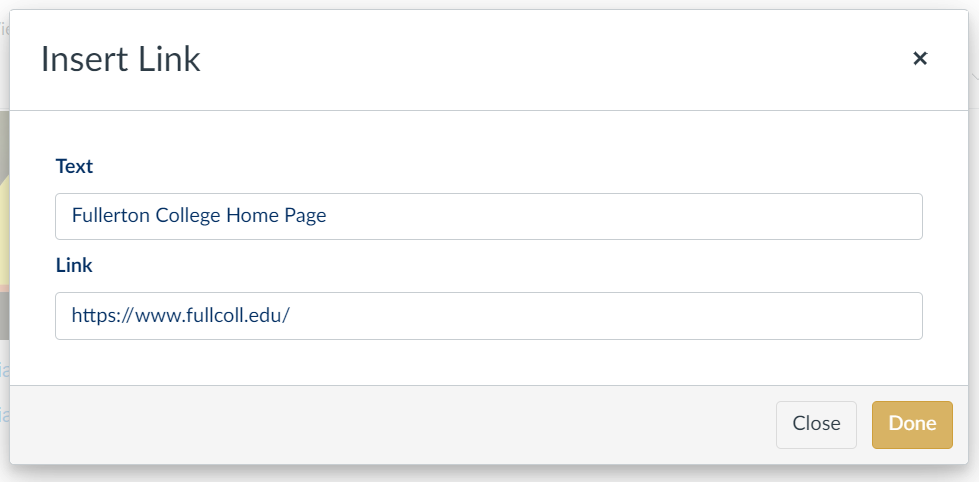
Adding Hyperlinks in Canvas
- Go to Insert > Link > External Link in the Rich Content Editor menu
- Type the descriptive link text in the first box
- Paste the URL in the second box
- Use the Done button to save your link
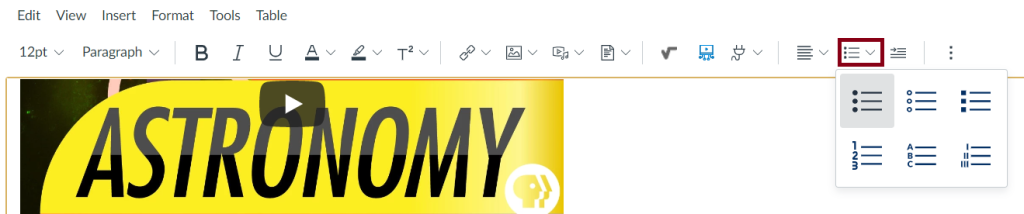
Lists
Use the ordered and unordered lists tool in the Rich Content Editor.
You can create a list from items you have already typed out, or you can add to a list as you go. All items on the list must be on separate lines (use the Return or Enter key to advance to the next line). Highlight the text that is part of your list, then select either the bulleted or the numbered list style.
If your items are a group of equivalent ideas or terms, and the order is not an essential part of the concept, use a bulleted list.
If your items are a sequence, steps to instructions, or an essential part of a whole (such as “there are six things you need to know to complete this assignment”), use a numbered list.
Math/Science Content
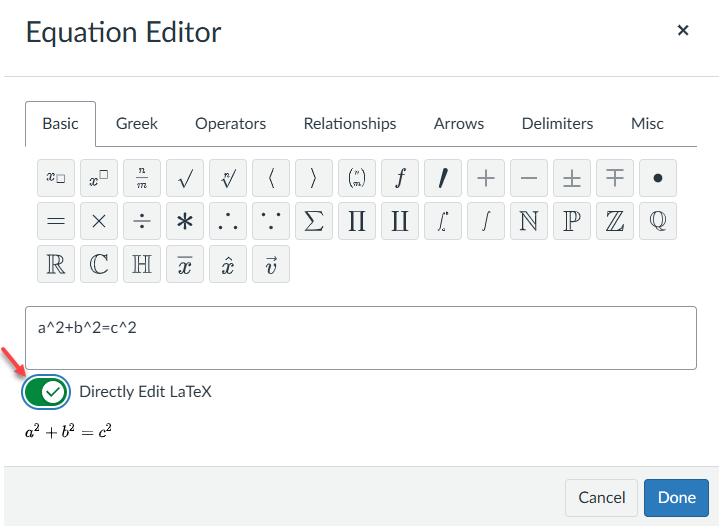
Use the built-in Canvas math equation editor to enter accessible math in your Canvas content. Canvas displays the math content as a scalable vector graphic (SVG), which enlarges without distortion. The equation editor also includes alt text and MathML.
To add an equation in the Rich Content Editor (RCE):
- Place your cursor where you would like the equation to display.
- Select Insert > Equation or use the Equation Editor icon on the RCE toolbar as shown below.

- Enter the equation using the Equation Editor tools.
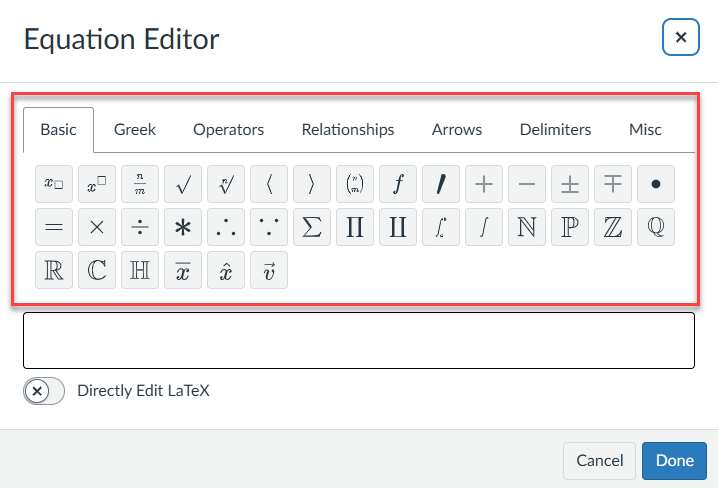
- You can also view and edit the LaTeX code behind the expression using the Directly Edit LaTeX toggle.
- Use the blue Done button to save your equation.
Keep in mind that some students may still need further accommodations (e.g. Braille, tactile graphics, etc.), which will be provided in collaboration with the Disability Support Services office.
To learn more about creating accessible STEM content:
Tables
Tables should only be used to provide data and not for page layout purposes!
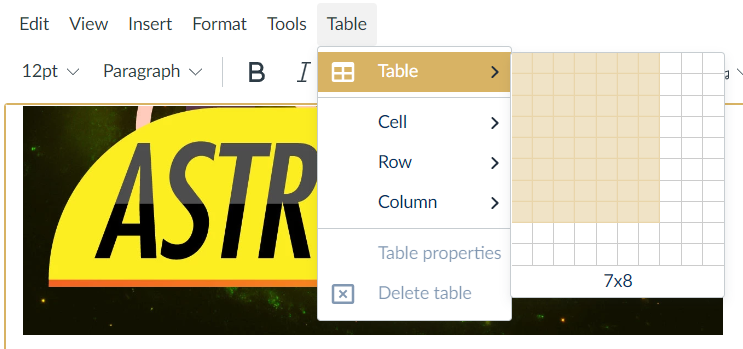
- Insert a table using the Table tool in the Rich Content Editor.
- To set the first row in your table as the header row, select the first cell in the table. Open the Table menu, then select Row > Row properties. Select Header in the Row type field.
- Save your table.

Page Level Accessibility Checkers
At Fullerton College, we have access to two different page-level accessibility checkers to assist in making our course content as accessible as possible. Both of these checkers are helpful tools, but it is important to remember that no automated tool catches everything!
Canvas Rich Content Editor Accessibility Checker
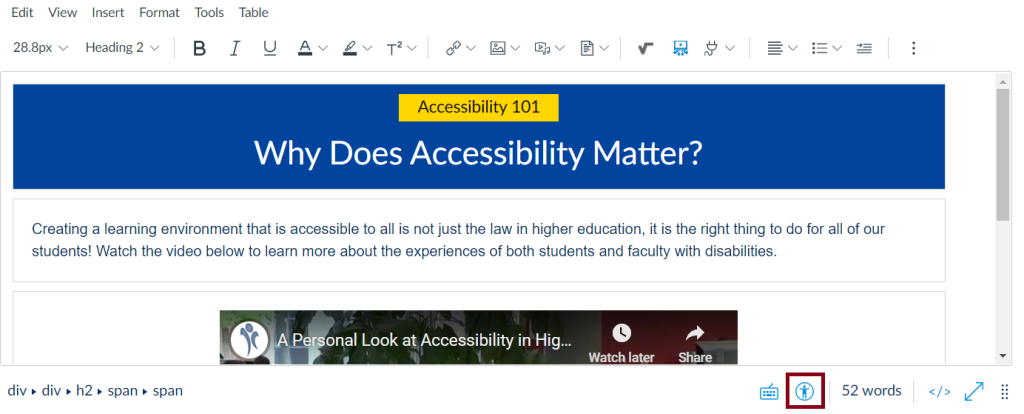
The Canvas Accessibility Checker verifies attributes within the Rich Content Editor and notifies the instructor of common accessibility errors that are present. The checker also provides an explanation of the error and the necessary fields to correct the accessibility error. You will find the Canvas RCE Checker at the bottom of the Rich Content Editor.
DesignPLUS Sidebar Accessibility/Usability Tab
The Cidi Labs DesignPLUS Sidebar has six different accessibility checkers that can be used on each page. Watch this 16-minute video to learn more.
UDOIT Course Level Accessibility Checker
Fullerton College faculty also have access to a course-level accessibility checker and it is recommended to run it on each course prior to publishing it for students. UDOIT scans an entire Canvas course, generates a detailed report, and provides guidance on addressing common accessibility issues.
Canvas Content
UDOIT scans the HTML of the following Canvas content items in your course:
- Announcements
- Assignments
- Discussions
- Pages
- Syllabus
- Module URLs
To get started with UDOIT, you must add it to your course navigation:
- Select Settings in your course navigation.
- Select the Navigation tab.
- Scroll down to the UDOIT Cloud option and use the three dots to the right.
- Select Enable.
- Save your changes to the menu.
To run a UDOIT scan:
- Select UDOIT Cloud in the course navigation. UDOIT will automatically start scanning. If the scan does not automatically start, select the blue Scan Now button. Depending on the size of your course, the scan will take a few minutes.
- Once the scan is complete, select either the Home or UFIXIT links.
- You will see your accessibility score, and a list of errors (issues that must be addressed) and suggestions (issues that generally should be addressed but may be ignored depending on the context within the course).
Watch this 4-minute video to learn more about the UDOIT Home Page interface:
Before you start making fixes in UDOIT, watch this 10-minute video:
Files
The latest version of UDOIT also checks your Microsoft Word, Microsoft PowerPoint, and PDF files for accessibility errors. Watch this 11-minute video to learn more about this feature.
Other Canvas Content
We must also ensure that all third-party content added to our courses is accessible. Distance Education staff have included some examples below, but this list is certainly not exhaustive. Usually, a simple Google search for “product +accessibility” will give you enough information to determine whether or not that product should be used in an online course.
Publisher Content:
Many publisher resources are not accessible. If you decide to use publisher resources, ask your rep to demonstrate the accessibility of the textbook activities, homework problem sets, and other resources. (Pro tip: ask the rep to navigate the interface using only the keyboard. If they can’t do it, neither can a student using assistive technology.)
You can also use this list of quick accessibility checks from the W3C Web Accessibility Initiative to get a basic sense of the accessibility of a website or other digital resource.
Other Popular LTIs and Sites:
- H5P Accessibility Report and Content Type Recommendations: many of the H5P activity types are inaccessible to students using screen reader software
- Padlet: has made some recent improvements, but is still not fully accessible
- Wakelet: has made some recent improvements, but is still not fully accessible
Student Accommodations
You will likely have students in your courses who have approved accommodations from the Fullerton College Disability Support Services office. The most common of these accommodations are extended testing time and extended time on assignments. Once you receive a student’s DSS Instructor Letter in your email, follow the instructions below to extend individual students’ testing time and assignment time.
Extended Testing Time in Classic Quizzes
- Select Quizzes in the course navigation menu.
- Open the quiz you need to adjust.
- Select Moderate this Quiz.
- Select the student who requires extended testing time and click the Edit (pencil) icon.
- You can also select more than one student and use the “Change Extensions for Selected Students” button.
- Add the appropriate amount of additional time in the “Extra time on every attempt” field.
- Verify the time extension is completed as you intended. You can also go to the Moderate Quiz screen and review all students with time extensions.
- You must repeat these steps for every Canvas Quiz in your course.
Extended Testing Time New Quizzes
If you use New Quizzes in your course, testing time accommodations can be set for a student one time and then applied for all future New Quizzes assessments in the course.
To set New Quizzes time accommodations for a student:
- Select Quizzes in your course navigation.
- Open the New Quiz you need to adjust.
- In the Moderate tab, locate the student name and select the Edit (pencil) icon in the Accommodations column.
- Under Time Adjustments, select the Time limit multiplier option.
- Choose the Time limit multiplier that matches the accommodation listed on the student’s DSS Instructor Letter. (The most common time multipliers at FC are 1.50 and 2.00.)
- Use the Save button to save the accommodation.
Extended Time on Assignments
- Select Assignments in your course navigation.
- Open the Assignment you need to extend.
- Edit the Assignment.
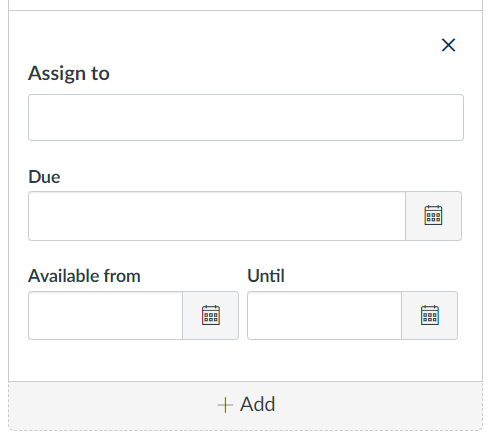
- Scroll down to the Assign to section and select Add.
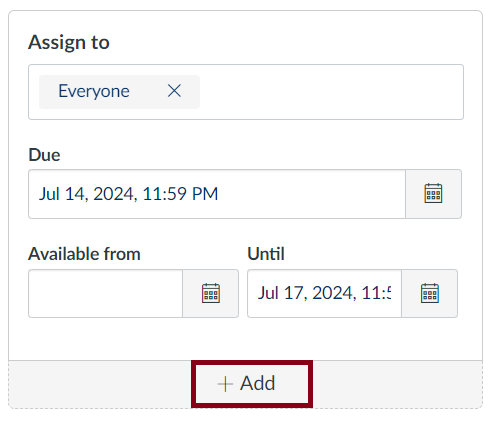
- Begin typing the student’s name in the Assign to field. (Note: You can add multiple students here if you have more than one student with the same extended time on assignments accommodation.)
- Enter the extended due date in the Due field.
- Enter dates in the Available from and Until fields as appropriate.
- Save the assignment when you are done.